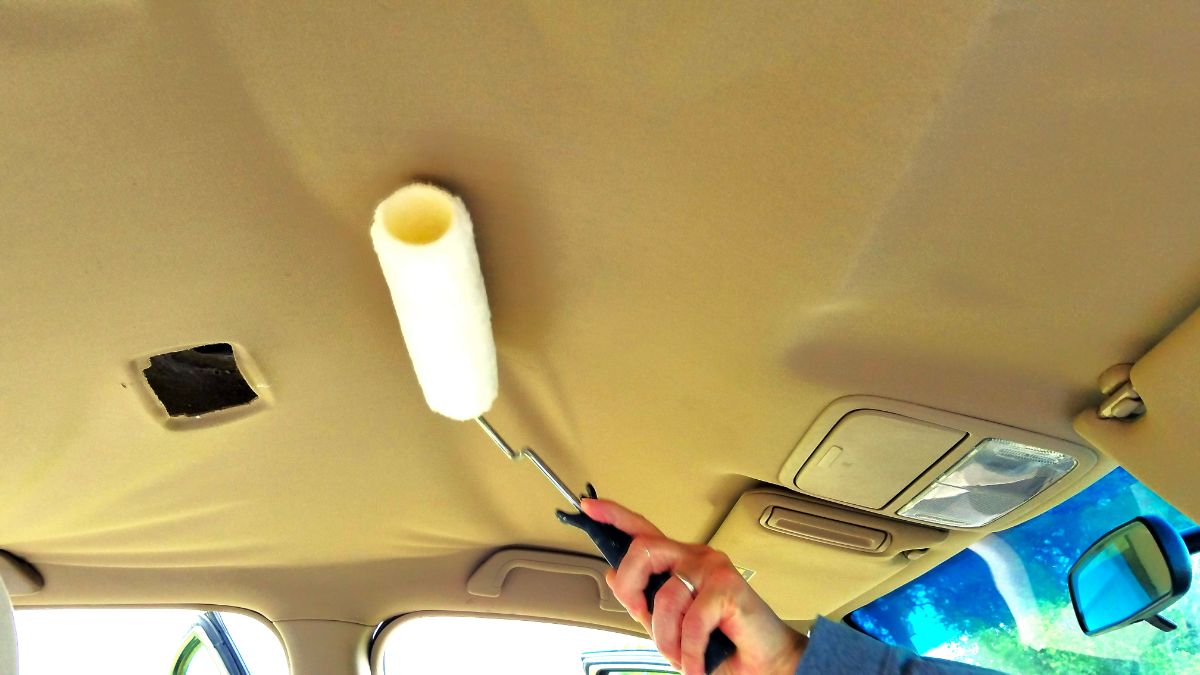
Assuming the car roof lining is already removed, you will need the following items: adhesive, cloth, and a roller. To begin, clean the area where the adhesive will be applied. Next, apply the adhesive to the cloth. Then, apply the cloth to the area of the roof lining that needs to be glued. Use the roller to smooth out any bubbles. Allow the adhesive to dry for at least 24 hours before reinstalling the roof lining.
How to glue back car ceiling fabric
If your car’s ceiling fabric has come loose, you can glue it back in place with a strong adhesive.
- First, clean the area around the fabric to ensure that the adhesive will stick.
- Next, apply the adhesive to the fabric and press it back into place.
- Hold the fabric in place for a few minutes to allow the adhesive to set, then enjoy your newly repaired car ceiling.
How to fix a loose headliner on a car?
If you have a loose headliner in your car, there are a few things you can do to fix it.
- First, try to locate the source of the problem.
- If the headliner is coming loose from the ceiling, you can use a strong adhesive to glue it back in place.
- If the headliner is sagging, you can use a piece of string or wire to secure it in place.
- Finally, if the headliner is wrinkled, you can use a steam iron to smooth it out.
Is your car ceiling fabric sagging or sagging?
If your car’s ceiling fabric is sagging or sagging, you can try gluing it back up.
- First, clean the area around the sag with a cloth and some soapy water.
- Next, apply a thin layer of glue to the underside of the fabric.
- Then, press the fabric back into place and hold it there for a few minutes.
- Finally, allow the glue to dry completely before putting the car’s roof back on.
What is the best adhesive for headliner repair?
This type of adhesive is extremely strong and will create a permanent bond between the headliner and the car’s roof. To apply the adhesive, simply mix the two parts together and then apply it to the headliner using a brush or a roller. Once the adhesive is dry, it will create a very strong bond that will hold the headliner in place for many years to come.
How much does it cost to repair a headliner car ceiling?
It can cost anywhere from $150 to $600 to repair a headliner in a car. The cost will depend on the severity of the damage and the type of car you have. If the headliner is sagging or has fallen down, you will likely need to replace it.
How to glue a headliner back on
If your car’s headliner is coming loose, you can try to glue it back on. Here’s how:
- Clean the area around the headliner with a cloth. This will help the glue adhere better.
- Apply a thin layer of glue to the headliner and the area around it.
- Press the headliner back into place.
- Wipe away any excess glue.
- Allow the glue to dry for a few hours before driving your car.
What kind of glue can you use to fix a headliner on a car?
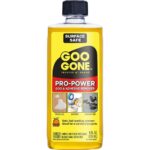
There are a few different types of glue that you can use to fix a headliner on a car. Some of the most common include Gorilla Glue, 3M Super 77, and Loctite Super Glue. To choose the right glue, you’ll need to consider the material of your headliner and the type of adhesive that will work best with it. Gorilla Glue is a good option for fixing headliners made from cloth or foam. For plastic or vinyl headliners, 3M Super 77 or Loctite Super Glue are better choices.
Once you’ve selected the right glue, you’ll need to follow the instructions on the packaging to apply it correctly. In most cases, you’ll need to apply the glue to both surfaces that you’re joining, wait a few minutes for it to become tacky, and then press the two surfaces together. If you’re not sure how to proceed, it’s always a good idea to consult with a professional. They’ll be able to help you choose the right glue and make sure that your headliner is properly attached.
Is Gorilla glue good for headliner?
It is also waterproof, which makes it ideal for use in cars. Gorilla glue is easy to use and dries quickly, so you can get your car back on the road in no time.
How many cans of glue do I need for a headliner?
If you’re wondering how many cans of glue you’ll need to attach a car’s headliner, the answer is probably around three. This will depend on the size of your car, of course, but three should be enough to get the job done. You’ll want to start by giving the headliner a good cleaning. Then, you’ll want to apply the glue to both the headliner and the car’s roof. Once you have a good amount of glue on both surfaces, you’ll want to press them firmly together and hold them for a few minutes. If you find that the headliner is still not secure after a few minutes, you can try adding more glue or clamping the headliner in place. Just be sure not to use too much glue, as this can cause the headliner to sag.
How do you fix a headliner that starts to fall?
If your car’s headliner starts to fall, you can fix it by gluing it back in place.
- First, clean the area where the headliner is coming loose.
- Then, apply a thin layer of glue to the headliner and the area around it.
- Press the headliner back in place and hold it there for a few minutes.
- Finally, let the glue dry completely before driving your car.
Will fabric glue work on a headliner?
You can use fabric glue to attach a headliner, but it’s not the best option. The glue may not hold well, and it can be difficult to get a good bond. If you’re going to use fabric glue, make sure to test it first on a small area to see how well it works.
Can you repair headliner without removing?
It’s possible to repair a headliner without removing it from the car, but it’s not the easiest way to do the job. The best way to repair a headliner is to remove it from the car and then glue it back in place. This way, you can get a good, tight bond between the headliner and the car roof.
How to fix a headliner the right way?
If your car’s headliner is sagging or coming loose, you can fix it yourself with some glue and a little elbow grease. Here’s how to do it the right way:
- First, clean the area around the headliner with a cloth and some soapy water. This will help the glue adhere better.
- Next, apply a generous amount of glue to the area where the headliner is coming loose. Use a putty knife or your fingers to spread it out evenly.
- Now it’s time to press the headliner back into place. Start at one end and work your way across, using your hands to smooth it out as you go.
- Once the headliner is back in place, use a hairdryer to heat the area for a few seconds. This will help the glue set faster.
- Finally, clean any excess glue off of the headliner with a cloth. And that’s it! Your headliner should be good as new.
How to recover your headliner?
If your car’s headliner is starting to sag, there are a few things you can do to try and fix it. One is to simply glue it back in place with a strong adhesive. Another is to use a steamer to loosen the fabric and then re-glue it. If your headliner is sagging, you can try to fix it by gluing it back in place with a strong adhesive. Another option is to use a steamer to loosen the fabric and then re-glue it.
To glue your headliner back in place, first clean the area around it with a damp cloth. Then, apply a generous amount of adhesive to both the headliner and the car’s roof. Press the headliner back into place and hold it there for a few minutes to allow the adhesive to set. If you’re using a steamer to fix your headliner, start by holding the steamer about six inches away from the fabric. Move it back and forth until the fabric is loosened. Then, apply adhesive to the headliner and roof as described above. Press the headliner back into place and hold for a few minutes to allow the adhesive to set.
What glue to use to reattach a car headliner?
If your car’s headliner has come detached, you’ll need to use a glue that can stand up to the heat and humidity inside a car. Headliner adhesive is available at most auto parts stores. Apply the adhesive to both the headliner and the car roof, then press the headliner into place. Hold it there for a few minutes until the adhesive sets, then let it dry overnight before using the car again.
How to fix that sagging headliner, glue a car ceiling?
A headliner is the fabric or material that is glued to the ceiling of a car. Over time, the headliner can become loose and sag. If this happens, you can fix it by reglueing the headliner to the ceiling. To do this, you will need some glue and some clamps. First, apply the glue to the headliner.
Then, position the headliner against the ceiling and clamp it in place. Leave the clamps in place for a few hours to allow the glue to dry. Once the glue is dry, the headliner should be firmly in place and will not sag.
How to glue roof lining in car
If your car’s roof lining has come loose, you can glue it back in place yourself. Here’s what you need to do:
- Clean the area around the loose lining with a cloth.
- Apply some glue to the area.
- Press the lining back into place.
- Hold the lining in place for a few minutes to allow the glue to set.
- Repeat steps 1-4 if necessary.
What can I use to glue my headliner back up?
If your car’s headliner is starting to come loose, you can use a glue to help hold it in place. There are a few different types of glue that can be used for this, so you will need to choose one that is appropriate for the material of your headliner. You may also need to use some other tools to help get the headliner back in place, such as a screwdriver or a hammer. Once you have everything you need, follow these steps to glue your headliner back up:
- Clean the area around the headliner that needs to be glued. This will help the glue to adhere better.
- Apply the glue to the headliner. Be sure to use a generous amount so that it will hold well.
- Press the headliner back into place. Use a screwdriver or other tool to help push it back if necessary.
- Hold the headliner in place for a few minutes to allow the glue to set.
- Repeat steps 2-4 if necessary.
Is Gorilla glue spray adhesive good for headliner?
It provides a strong bond that is resistant to heat and moisture. This product is easy to use and provides a professional looking finish.
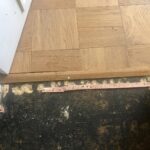
How do you fix a loose roof lining on a car?
How to fix a loose roof lining on a car A loose roof lining can be a nuisance, and if left unchecked, can cause serious damage to your car. Luckily, there is a relatively easy fix for this problem. All you need is a strong adhesive and a few minutes of your time. To begin, clean the area around the loose lining with a cloth. This will help the adhesive to better adhere to the surface.
Next, apply a generous amount of adhesive to the back of the lining. Be sure to evenly distribute the adhesive, as this will ensure a stronger hold. Finally, press the lining back into place and hold it there for a few minutes. With a little bit of effort, you can easily fix a loose roof lining on your car. This quick repair will keep your car’s interior looking and feeling like new.
How to glue roof lining on a car headliner?
To glue your car’s roof lining, you’ll need a few supplies. First, gather some white glue, a few rags, and a utility knife. You’ll also need a screwdriver to remove any screws holding the old roof lining in place. Once you have your supplies, begin by removing the old roof lining. Use the utility knife to cut away any adhesive, then use the screwdriver to remove any screws.
With the old roof lining removed, you can now begin to glue the new one in place. Start by spreading a layer of glue on the roof. Then, place the new roof lining in place and smooth it down. Be sure to press it down firmly so that it will adhere properly. Once the new roof lining is in place, you can use the rags to wipe away any excess glue. Allow the glue to dry for a few hours before replacing any trim pieces or screws that were removed. Once everything is back in place, your car’s roof lining will be good as new!
What kind of glue do you use for roof lining?
When it comes to gluing car roof lining, there are a few different options that you can choose from. One popular option is to use a product called Liquid Nails. This product is designed specifically for bonding roofing materials, and it can be found at most hardware stores. Another option is to use a general-purpose adhesive such as Super Glue. This type of glue can be found at most stores that sell crafting supplies. Whichever type of glue you choose, be sure to read the instructions carefully before beginning the project.
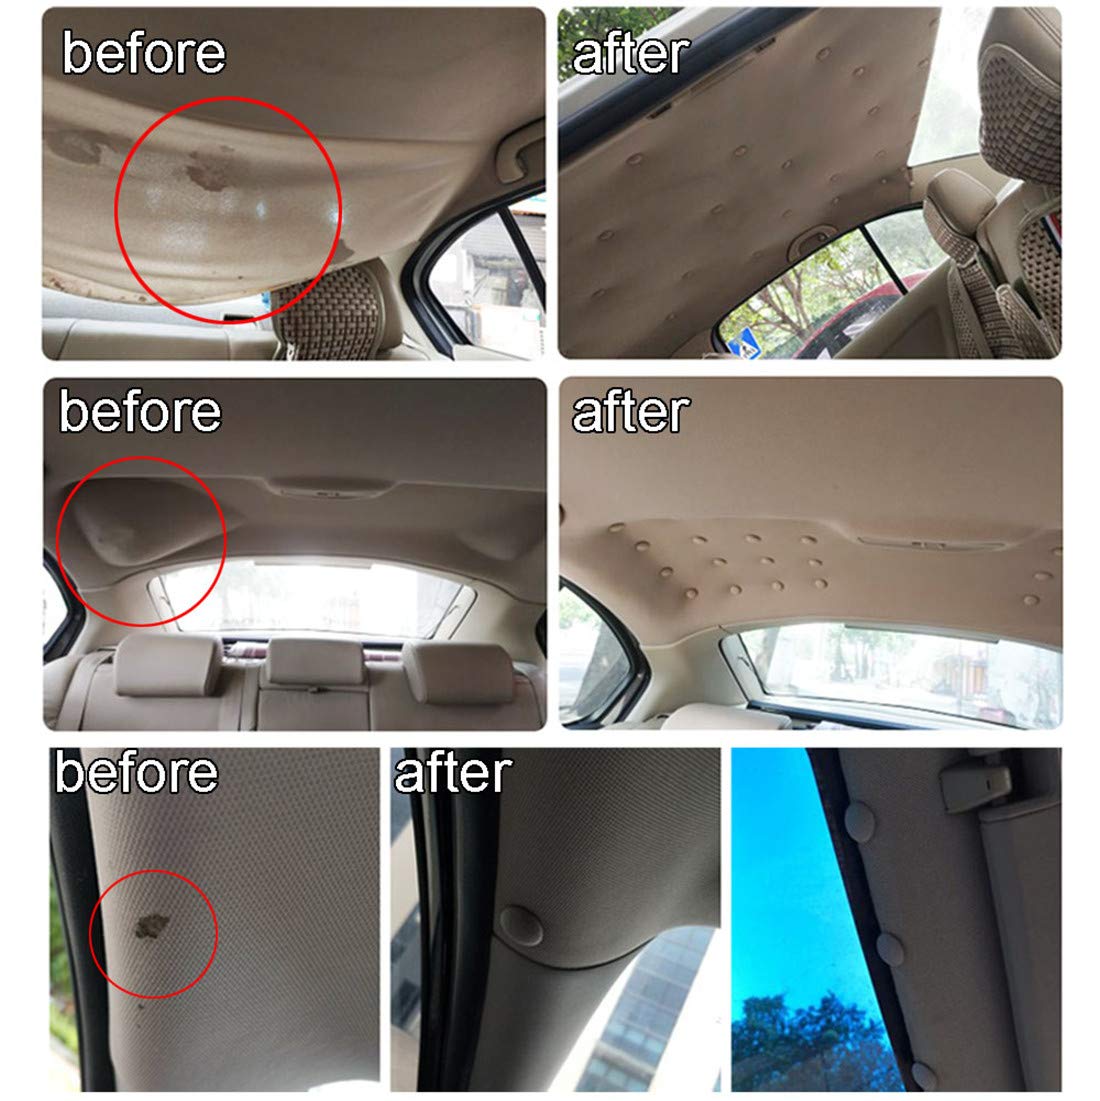
How to fix a sagging car roof liner?
If you have a sagging car roof liner, there are a few things you can do to fix it. One option is to glue it back up. You can use a special adhesive for this, or you can use a strong household glue. Another option is to stapled the liner back up. This will require a little more work, but it will be more secure in the long run. You can also try to fix the sag by adjusting the clips that hold the liner in place.
How to attach car roof lining back to the roof?
If your car’s roof lining has come loose, you can reattach it using glue. Here’s how:
- Start by cleaning the area where the roof lining will be glued. This will help the glue to adhere better.
- Apply a thin layer of glue to the area.
- Place the roof lining back in place and press it down firmly.
- Hold the roof lining in place for a few minutes until the glue has dried.
- You may need to apply a second layer of glue to secure the roof lining. Let the glue dry completely before driving your car.
How to glue ceiling fabric in car
If you’re looking to add a little extra flair to your car’s interior, consider gluing some fabric to the ceiling. This can be a great way to add color or pattern to your car’s roof, and it’s relatively easy to do. Here’s a quick guide on how to glue ceiling fabric in your car.
- Start by cleaning the area where you’ll be applying the fabric. Use a lint-free cloth to remove any dust or debris.
- Cut the fabric to size, making sure to leave enough excess to tuck under the edges of the ceiling.
- Apply a thin layer of fabric adhesive to the back of the fabric. Be careful not to use too much, as this can make the fabric hard to work with.
- Press the fabric into place on the ceiling, starting at one corner and working your way around. Use your fingers to smooth out any wrinkles or bubbles.
- Once the fabric is in place, use a sharp knife to trim away any excess fabric. And that’s it! With a little bit of time and effort, you can add some unique style to your car’s interior with glued-on ceiling fabric.
What is the best glue to use on a car headliner?
When it comes to gluing a car headliner, there are a few different options to choose from. However, the best glue to use is likely going to be a spray adhesive. This type of glue is specifically designed to adhere to fabric, making it ideal for use on a car headliner. Plus, it provides a strong bond that will hold up over time.
How do you fix a leaking headliner on a car?
A headliner is the fabric or material that lines the roof of a car. Over time, the headliner can become loose or start to sag, and if it is not repaired, it can start to leak. To fix a leaking headliner, you will need to remove the old headliner and glue a new one in place. First, remove the trim pieces that are holding the headliner in place. Next, remove the headliner itself, being careful not to damage the car’s roof.
Once the old headliner is removed, clean the surface of the roof and apply a layer of adhesive. Then, place the new headliner in place and hold it until the adhesive sets. Finally, reattach the trim pieces and enjoy your new, leak-free headliner.
What kind of glue do you use to fix a headliner?
This type of adhesive will hold the headliner in place firmly and prevent it from sagging or falling down over time. When using a spray adhesive, be sure to follow the instructions on the label carefully and apply the adhesive in a well-ventilated area.
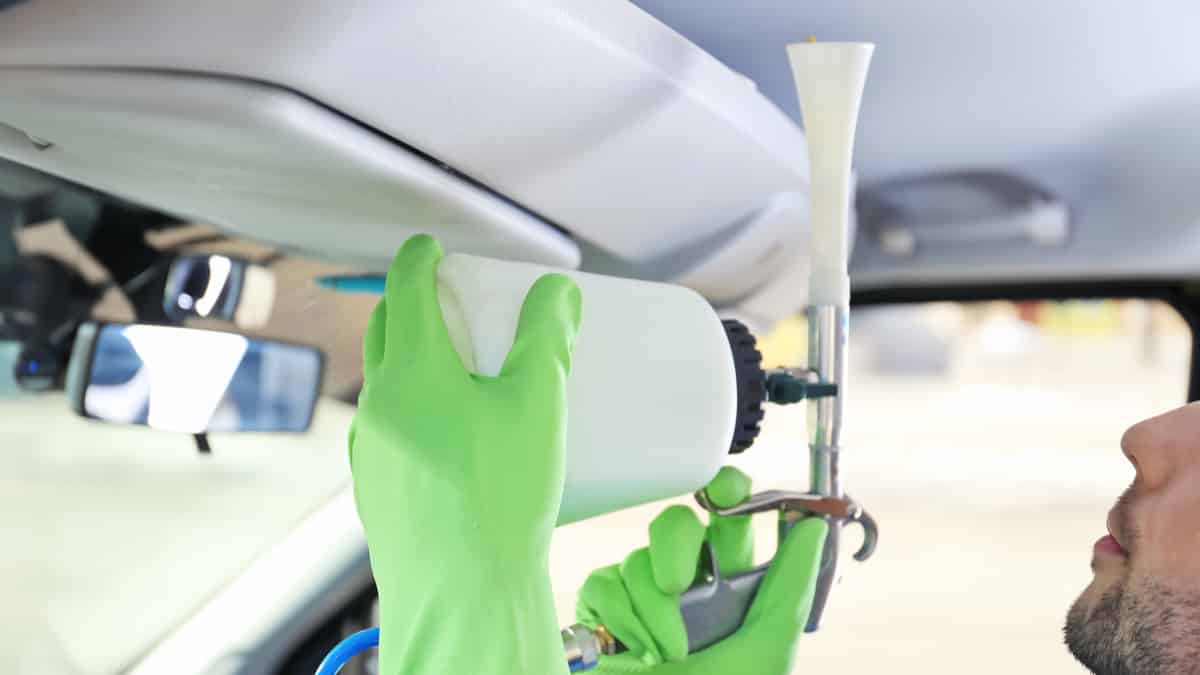
Can you use spray adhesive on car interior?
You can use spray adhesive on car interior to glue car roof lining. However, it is important to test the adhesive on a small area first to ensure that it does not damage the car’s interior. Once you have tested the adhesive, you can spray it onto the car roof lining and then press it into place.
How to fix sagging headliner using spray adhesive
To fix your sagging headliner, you’ll need to use some spray adhesive.
- First, remove any loose fabric or debris from the area.
- Next, clean the surface with a cloth dampened with rubbing alcohol.
- Then, apply the adhesive to the back of the headliner, and press it into place.
- Hold it there for a few seconds to allow the adhesive to set.
- Finally, use a hairdryer to heat the area and help the adhesive bond.
Will spray adhesive work on headliner?
It is possible to use spray adhesive on headliner, however it is not the most ideal option. It is difficult to get an even coat with spray adhesive, and it can be difficult to work with once it is applied. If you choose to use spray adhesive, be sure to follow the instructions carefully and test it on a small area before proceeding.
How do you fix a sagging car headliner without removing it?
A sagging car headliner can usually be fixed without removing it. To do this, you will need to purchase some headliner adhesive and a few tools. First, remove any loose fabric or trim from around the headliner. Next, use a putty knife to apply the adhesive to the back side of the headliner. Be sure to apply it evenly.
Then, use a hairdryer to heat up the adhesive. Once the adhesive is heated, press the headliner back into place. Hold it there for a few minutes to allow the adhesive to set. Finally, reattach any loose fabric or trim.