Adhesive vinyl is a versatile and durable material that is perfect for a variety of craft projects. It can be used to create signs, wall decals, and other decorations. If you have a Silhouette cutting machine, cutting adhesive vinyl with it is easy. First, load the adhesive vinyl into your cutting machine. Make sure to select the correct material setting according to the type of vinyl you’re using.
Then, use the Silhouette software to design your project and adjust the settings as needed. Next, cut the vinyl by pressing the start button on the cutting machine. The machine will then generate a cut line on the vinyl. Cut out the design along this line using a pair of scissors or a craft knife. Once you’ve finished the cutting, you can use transfer paper to place the vinyl onto your project surface. Finally, apply pressure to the vinyl so that it adheres to the surface. Peel off the transfer paper and your adhesive vinyl project is complete! Cutting adhesive vinyl with a Silhouette cutting machine is an easy and effective way to create fun and unique projects. Whether you’re making a wall decal, a sign, or something else, adhesive vinyl is a great material for any craft project.
How to cut adhesive vinyl with silhouette cameo 4
First, select the type of material you want to use and then insert it into your cutting machine. Make sure the vinyl is placed correctly and that your machine is set to the right settings. Next, open the design software and choose the design you want to cut. Adjust the size and orientation of the design before you start cutting. After you have finished adjusting the design, select the “Cut” button.
The Silhouette Cameo 4 will then start cutting your design. When the cutting is complete, remove the vinyl from the machine and place it onto a flat surface. Peel off the excess vinyl surrounding your design. Then, use a transfer tape to transfer your design from the vinyl sheet onto any surface you desire. Finally, use a squeegee to firmly press the vinyl onto the surface. Make sure to press firmly enough that all parts of the vinyl design adhere to the surface. Once you have done this, the adhesive vinyl is ready to use!
How do you cut permanent vinyl on Cameo 4?
All you need is the machine itself, some adhesive vinyl, and a cutting mat. Begin by placing the vinyl onto the cutting mat, with the adhesive side facing down. You can then use the touch screen on the Silhouette Cameo 4 to select the type of vinyl you are working with. If you are using permanent vinyl, the machine should detect it and adjust the settings accordingly. Now, load the cutting mat into the machine.
The Silhouette Cameo 4 will then begin to cut the vinyl. Make sure to use the right settings for the type of vinyl you are using. Once the cutting is complete, remove the sheet of permanent vinyl from the cutting mat. You can then weed out any unwanted pieces of vinyl, leaving behind only the design you wish to use. Finally, you can transfer the design onto the desired surface. Use a transfer tape to lift the design off the cutting mat and place it onto the desired surface. Once it is firmly in place, you can remove the transfer tape and enjoy your newly cut permanent vinyl design!
Can you cut self adhesive vinyl?
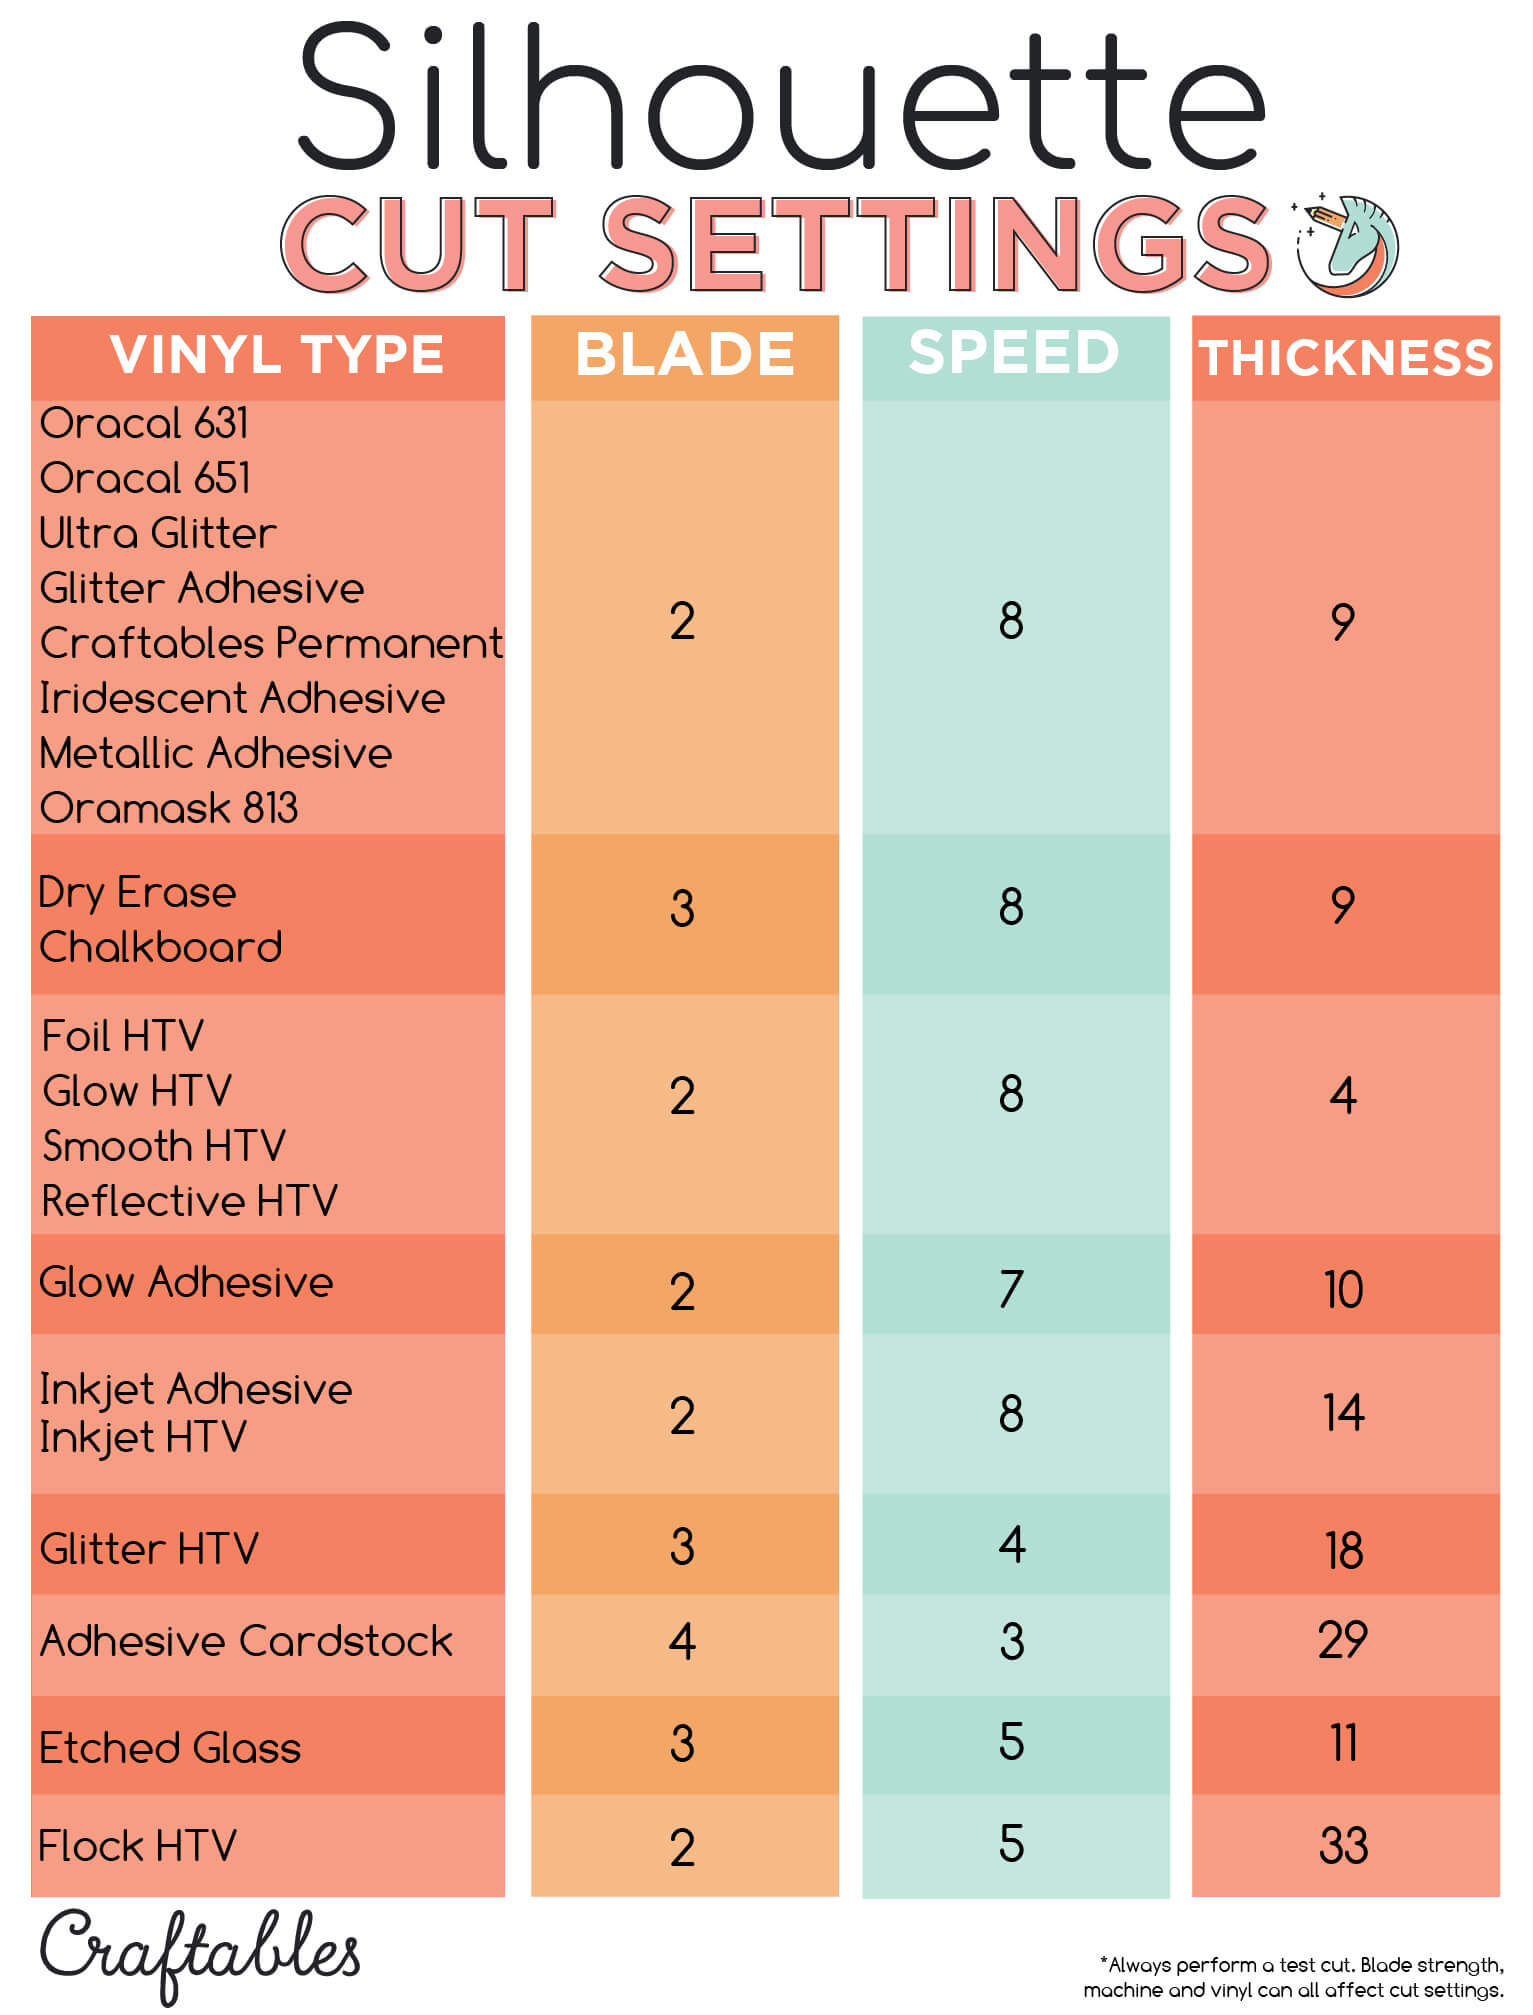
To begin, you’ll need to determine the type of self-adhesive vinyl you want to use. You may want to choose a vinyl based on the color, finish, or durability you need for your project. Next, you will need to install the appropriate cutting blade into your Silhouette machine. Most Silhouette models use a blade setting of 3 or 4 to cut vinyl. Once you have the blade in place, adjust the force and speed settings on your machine.
The higher the force, the more easily it will cut through the vinyl. Next, you will need to load your vinyl into the machine. The self-adhesive side of the vinyl should be facing up. When the cutting is complete, you will be left with a roll of vinyl with the letters and images cut into it. To cleanly remove the excess vinyl, use a weeding tool or craft knife to carefully remove the negative space around the images or words. Once all the excess vinyl has been removed, you can apply your vinyl decal to any surface. Cutting self adhesive vinyl with a Silhouette machine is a great way to customize and make your own signs and decals. With the right tools and a bit of patience, you can easily create your own projects with adhesive vinyl.
How to cut fabric with a silhouette?
It’s a relatively easy process, but there are a few things to consider before you start. First, you’ll need to make sure you have the right fabric for your project. Choose a fabric that is smooth, lightweight, and not too thick. You’ll also want to make sure the fabric is cut to the size you need, as the Silhouette will not be able to cut oversized pieces. Next, you’ll need to prepare your fabric for cutting.
Position the fabric on the cutting mat and secure it in place, then adjust the blade depth. The blade depth should be set to 2 so that it can cut through the fabric without damaging it. Before you start cutting, you can use the Silhouette software to create your design. Once the design is ready, you can send it to the machine, and the blade will start cutting out the fabric. Finally, remove the cut fabric from the cutting mat and carefully peel away the remaining fabric. Your fabric is now ready for sewing or other projects, and you can enjoy the results of your hard work!
How to perform a test cut with the silhouette cameo?
To perform a test cut with the Silhouette Cameo, begin by loading your vinyl into the machine. Make sure that the vinyl is placed with the cutting side facing up. Then, select the design that you want to cut from the Silhouette Studio Software. Once the design is selected, choose the material type from the drop-down menu. For adhesive vinyl, select “Adhesive Vinyl”.
Finally, adjust your blade settings for the vinyl material and click “send” to begin the test cut. The Silhouette Cameo will then cut a small section of the design to test the settings. Once you are sure that the settings are correct, click the “Cut” button to proceed with the full cut.
How to cut sugar sheets with your silhouette cameo?
Cutting sugar sheets with a Silhouette Cameo can be surprisingly easy. First, ensure that your cutting mat is clean and free of debris. When you’re ready to begin, place the sugar sheet onto the cutting mat, making sure it’s straight and aligned with the mat’s grid. Then, open the Silhouette software, select the Sugar Sheet tool from the Cut Settings Panel, and load your cutting mat into the Silhouette. Once you’ve loaded the cutting mat, adjust the cutting settings according to what type of sugar sheet you’re using.
You can adjust the pressure, speed, and blade type from the Silhouette software. Once you’ve made your adjustments, click the “Send to Silhouette” button. The Silhouette will begin cutting the sheet. When the sheet has finished cutting, carefully remove it from the cutting mat. Then, use a craft knife or razor blade to separate individual shapes from the sheet. Finally, use a pair of scissors to trim away any excess sugar sheet that may be surrounding the shape. With a little practice, you can easily learn how to cut sugar sheets with your Silhouette Cameo. However, it is important to remember that cutting sugar sheets can be a bit tricky and it may take a few tries before you get the hang of it.
How to cut stickers with a silhouette?
First, load the vinyl into the machine. Adjust the blade so that it’s sharp enough to cut through the vinyl. Then, use the software that comes with the Silhouette machine to create a design. Once your design is ready, load the vinyl into the machine and press “send” to start cutting. When the machine is done cutting the vinyl, carefully remove it from the machine. Once the vinyl is out of the machine, use scissors or a hobby knife to cut out the individual stickers. Finally, remove the excess vinyl and peel away the adhesive backing to reveal your beautifully cut stickers.
How to use adhesive vinyl with silhouette
To start, you’ll need to select the right type of vinyl for your project. Adhesive vinyl comes in many colors and finishes, so be sure to look for the one that best fits your project. Next, you’ll need to prepare your Silhouette cutting machine. Make sure the blade is set to the appropriate size for your vinyl and load the vinyl onto your cutting mat. You may need to adjust the blade depth if your vinyl is particularly thick.
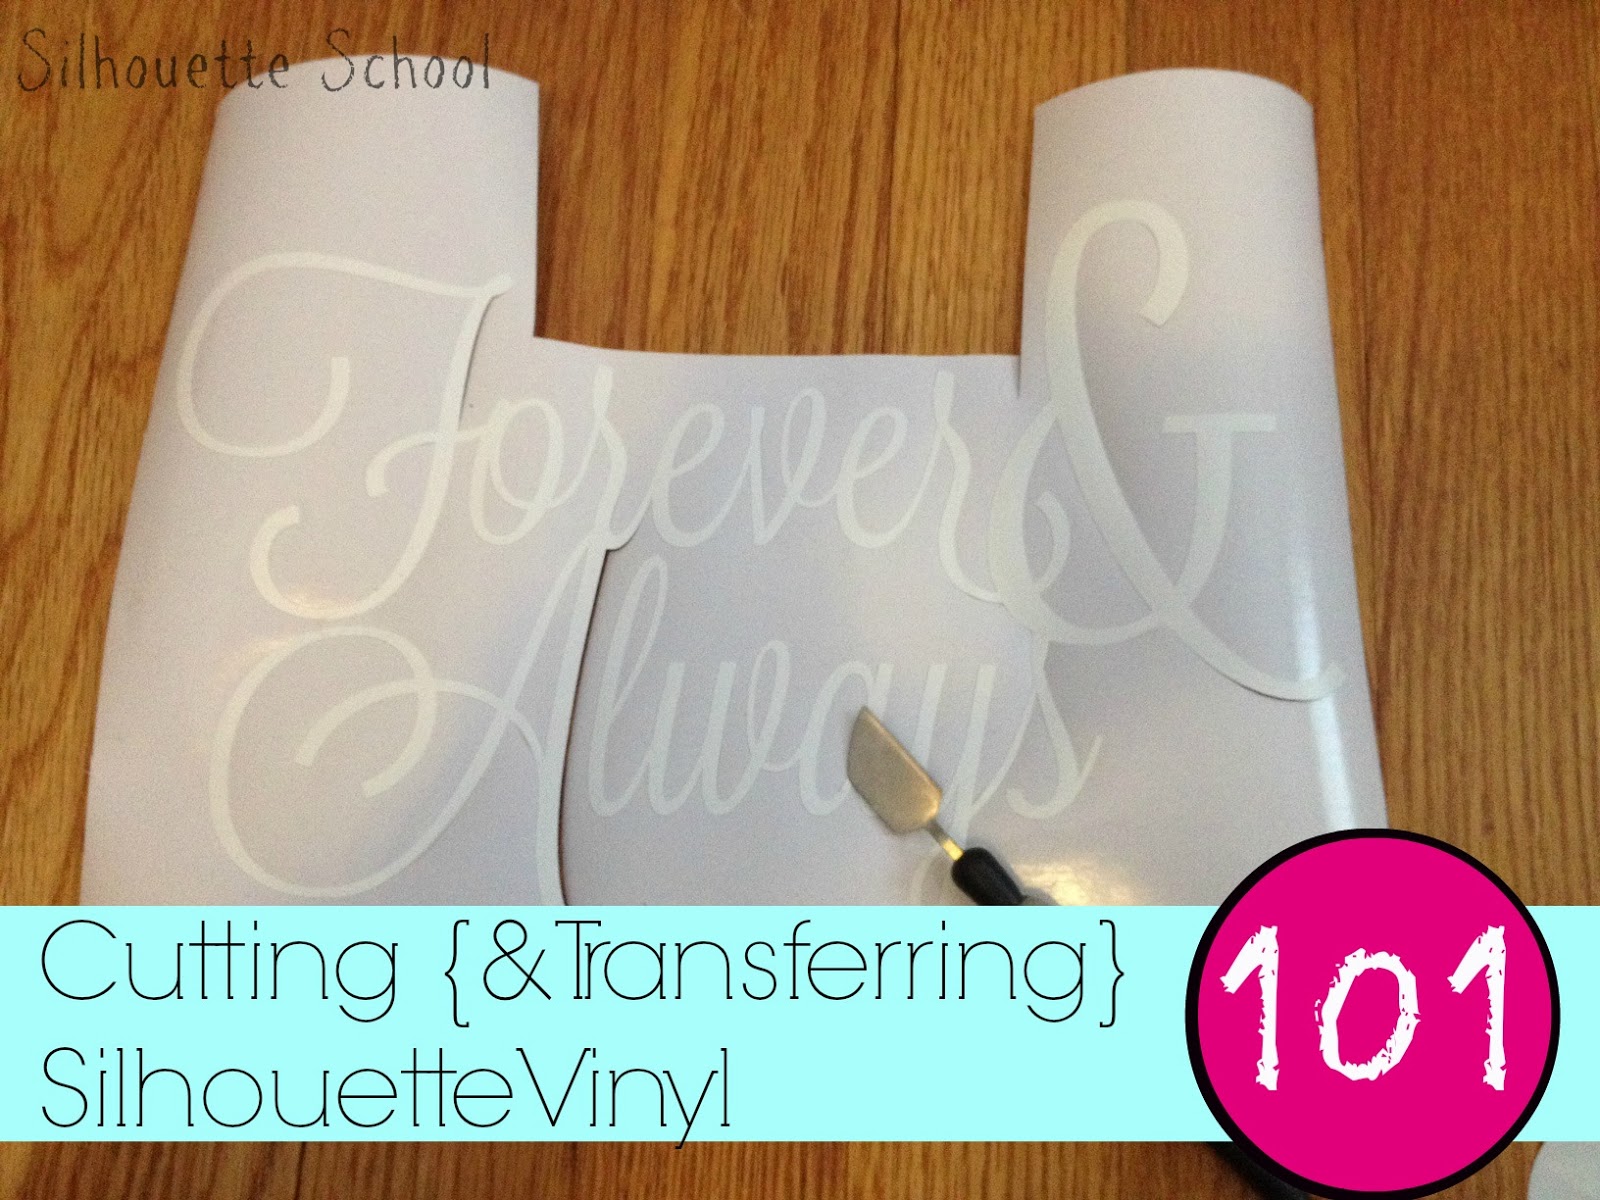
Once your machine is ready, you can begin cutting your adhesive vinyl. Open the design software and load your design. Adjust the size and settings for your project and then click “Send to Silhouette”. Your Silhouette cutting machine will then begin to cut your design. Once the vinyl has been cut, remove it from the cutting mat. Be sure to use a weeding tool to remove any extra vinyl pieces. Finally, you can use transfer tape to apply the adhesive vinyl to your desired surface. Peel off the backing of the transfer tape and place the vinyl onto the tape. Carefully position the vinyl on your surface and then press to adhere. With a little practice, you’ll be able to use adhesive vinyl with a Silhouette cutting machine to create beautiful decals and labels. Enjoy!
What is Silhouette adhesive vinyl used for?
This vinyl has a permanent adhesive backing, which means it can be used for a variety of crafts and projects. Silhouette adhesive vinyl can be used to create custom decals, labels, monograms, and signs. It is ideal for wall art, window decals, and car decals. It is also great for creating personalized gifts and products. Cutting adhesive vinyl with a Silhouette cutting machine is easy and straightforward.
Simply load the vinyl onto your cutting mat and send the cutting job to your Silhouette machine. The machine does the rest of the work for you. It will precisely cut the vinyl to the exact shape you want. Once the vinyl has been cut out, you can use a transfer paper to apply it to your desired surface. This transfer paper helps you to accurately place the vinyl in the exact spot that you want. Silhouette adhesive vinyl is a great way to add some custom designs to any project. It is easy to use and can be applied to almost any kind of surface. With a little patience and creativity, you can create one-of-a-kind designs that you won’t find anywhere else.
What is the difference between vinyl and adhesive vinyl?
Adhesive vinyl and vinyl are similar materials; however, they have different properties that make them useful for different applications. Adhesive vinyl is made of PVC film that has a pressure-sensitive adhesive backing, while regular vinyl is thicker and more durable. Adhesive vinyl is often used for preparing graphics, decals, and signs, while regular vinyl is used for clothing, shoes, and home décor. When it comes to cutting with a Silhouette machine, adhesive vinyl needs to be cut with a cutting mat as it can easily stick to the cutting mat. Regular vinyl, on the other hand, can be cut without the use of a cutting mat as it is thicker and won’t stick to the Silhouette machine.
In addition, when it comes to weeding, adhesive vinyl can be weeded without the use of a weeding tool. Regular vinyl requires the use of a weeding tool in order to remove the excess material from the designs. When it comes to adhesion, adhesive vinyl sticks to any smooth, non-porous surface, while regular vinyl often needs to be heated in order to adhere to the material. In short, adhesive vinyl and regular vinyl are both great materials to use with a Silhouette machine. Before you choose one or the other, make sure to consider the differences in terms of application, cutting, weeding, and adhesion.
What can you put adhesive vinyl on?
With the help of a Silhouette machine, it is possible to cut adhesive vinyl into a variety of shapes and designs. Adhesive vinyl can be applied to almost any smooth surface including walls, furniture, car windows, laptops, and even mugs! It is a great way to add custom designs to any space or item. To cut adhesive vinyl with your Silhouette machine, you will need to first prepare the vinyl. Make sure to cut the vinyl to the correct size and place it on the Silhouette cutting mat. Load the cutting mat onto the Silhouette machine and make sure the settings are correct.
Once your Silhouette is ready, you can begin to cut the vinyl. Select the type of vinyl you are planning to cut, and then use the Silhouette software to create your design. Once the design is ready, you can then move it to the cutting mat and start cutting. When the cutting is complete, you can now peel off the cut adhesive vinyl from the cutting mat and apply it to whatever surface you desire. With adhesive vinyl, you have the freedom to express your creativity and personalize any space or item.
When using adhesive vinyl which side goes down?
When using adhesive vinyl with a Silhouette machine, it is important to ensure that the vinyl is placed correctly. The glossy side of the vinyl should be facing downwards when being cut. To keep the adhesive vinyl in place, it is recommended to use a cutting mat. This will prevent the vinyl from shifting and ensure a precise cut. Furthermore, the cut settings should be adjusted accordingly. Be sure to select the correct blade type and adjust the blade depth to the correct setting when cutting adhesive vinyl with a Silhouette machine. With the correct settings, you can ensure that you get the best results possible.
Is adhesive vinyl face up or down?
When cutting adhesive vinyl with a Silhouette, it’s important to know whether to place the vinyl face up or face down. Generally, the adhesive side of vinyl should be placed face down on the cutting mat so that the design can be cut onto the adhesive side. This will ensure that the design will be securely attached to whatever surface it is placed upon. If you are using a heat transfer adhesive vinyl, the vinyl should be placed face up on the cutting mat so the design is cut on the back side of the vinyl. This type of vinyl is best used to transfer a design onto a fabric surface, so the adhesive side should not be cut.
When cutting any type of adhesive vinyl, be sure to use the proper settings on your Silhouette. The right settings will ensure that the vinyl is cut cleanly and accurately, making for a better final product. Overall, when cutting adhesive vinyl with your Silhouette, it is important to know whether to place the vinyl face up or face down. The adhesive side should generally be placed face down so that the design can be cut onto the adhesive side. Heat transfer adhesive vinyl should be placed face up with the design cut onto the back side. Lastly, use the proper settings on your Silhouette to ensure that the vinyl is cut accurately and cleanly.
Do you mirror adhesive vinyl?
Do you mirror adhesive vinyl before cutting it? Yes, you should always mirror adhesive vinyl when cutting with a Silhouette machine. This ensures that the design is facing the right direction when applied to the surface. To mirror the adhesive vinyl, go to the machine’s settings and select “mirror” before cutting. Make sure to re-size the design if necessary, as the mirrored version will be flipped. After mirroring the design, you can start the cutting process. Always make sure to use the correct settings for the type of adhesive vinyl you are using. This will ensure that you get an accurate cut and a great result.