Installing an adhesive backsplash is a relatively easy task that anyone can do with a few supplies. First, you will need to measure the area you want to cover and purchase the appropriate amount of adhesive backsplash. Make sure to calculate how much you will need for each section of the wall. Next, you will need to clean the wall thoroughly to ensure your adhesive backsplash adheres properly. Use a damp cloth to get rid of any dust, dirt, or grease.
Once the wall is clean, you can begin to install your adhesive backsplash. Peel off the adhesive backing and gently place it onto the wall. Use a ruler or straight edge to make sure it is straight. When all of the adhesive backsplash is installed, you can finish it off with some sealer or grout. This will help protect it from moisture and also give it a finished look. Finally, once the sealer or grout has dried, you can enjoy the look of your new adhesive backsplash. It’s an inexpensive and easy way to update the look of any kitchen or bathroom.
How to install self adhesive backsplash
Here are the steps to follow:
- Start by cleaning the wall where you will be adding the backsplash. Make sure it’s free from dust, dirt, and grease.
- Measure the area of the wall where you want to install the self-adhesive backsplash and cut the material accordingly.
- Peel off the backing paper from the self-adhesive backsplash and stick it to the wall.
- Use a roller or a rubber squeegee to press the backsplash firmly against the wall.
- Finally, seal the edges of the backsplash with caulk or silicone sealant.
- Let the caulk or silicone sealant dry completely before using the area.
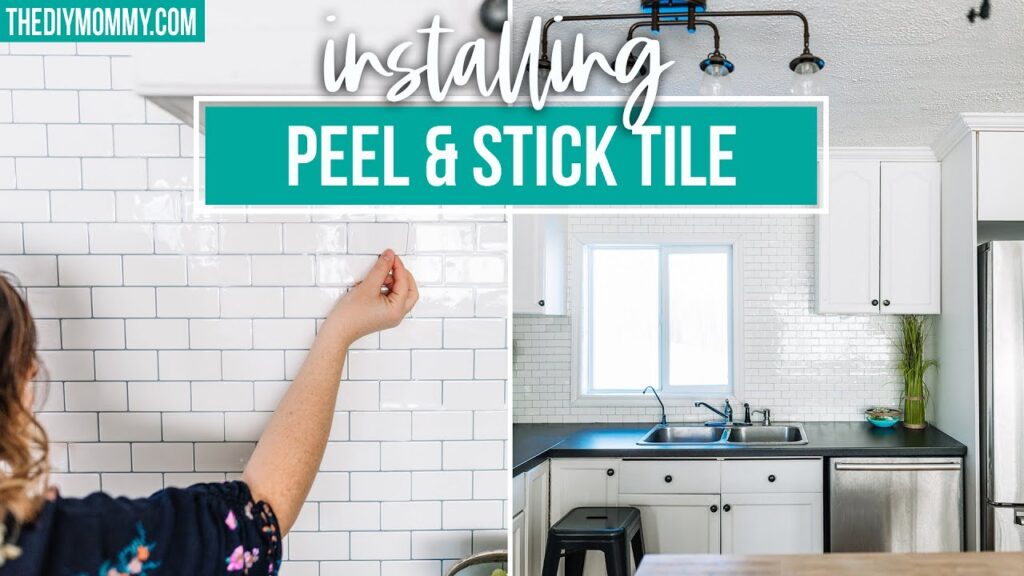
Does peel and stick backsplash stay on?
Installing an adhesive backsplash can be an easy and cost-effective way to spruce up your kitchen. Peel and stick backsplash is one popular option for homeowners. It is an easy DIY project that anyone can take on in a matter of hours. But does peel and stick backsplash stay on? The answer is yes, as long as it is installed properly. Peel and stick backsplash has adhesive backing which helps it to stay firmly in place.
To make sure the backsplash stays on for a long time, you should follow the manufacturer’s instructions when installing it. Start by cleaning the wall area where you are going to install the backsplash. Once the area is clean and dry, measure the space where you are going to place the backsplash. Cut the peel and stick backsplash to the desired size, then line it up against the wall and press down firmly to ensure a strong bond. Finally, wipe down the backsplash with a damp cloth to activate the adhesive. Allow it to dry and you are done. With the right preparation and application, peel and stick backsplash will stay on for a long time!
How do you prepare a wall for peel and stick backsplash?
Before installing the backsplash, it is important to properly prepare the wall. Start by cleaning the wall with a mild cleaner and a soft cloth. Make sure to remove any dust, dirt, soap scum, or grease that may have built up on the wall. Once the wall is clean, sand down any imperfections using very fine sandpaper. This will ensure that the adhesive will have a smooth surface to adhere to.
Next, use a damp cloth to remove any dust that was created from the sanding process. Allow the wall to dry completely before moving on to the next step. Finally, use a high-quality primer to prime the wall before installing the peel and stick backsplash. This will help ensure the adhesive sticks properly and that the backsplash looks great for many years to come.
Is peel and stick backsplash easy to install?
Installing an adhesive backsplash can be a great way to give your kitchen a modern and stylish makeover. Peel and stick backsplash is an easy and affordable way to achieve this. It can be installed quickly and with minimal effort. To begin, clean the wall surface where the backsplash will be applied. Make sure all dirt and dust is removed before applying.
Then, measure the wall and cut the backsplash pieces to size. Mark out the area where you will be applying the adhesive with a pencil, so you know where to adhere the backsplash. Next, peel off the backing paper from the adhesive and stick it to the wall. Use a ruler to check that the pieces are in the correct position and make sure the edges are firmly pressed against the wall. Finally, apply grout or caulk to the edges of the backsplash, to ensure a clean finish. Overall, installing peel and stick backsplash is a fairly straightforward task and can be completed in a matter of minutes. With a little bit of preparation, you can easily transform the look of your kitchen with an eye-catching backsplash.
How easy it is to install a new tile backsplash?
Installing a new tile backsplash is actually quite easy. All you need is the right materials, some basic tools and a bit of patience. The first step is to prepare the surface for the backsplash. If you’re working with a painted wall, you’ll want to use a sanding sponge to lightly scuff up the area before you start. This will help the adhesive bond better to the wall.
Next, you’ll need to measure the area and cut the tiles to fit. A wet saw is the best tool for cutting tile, but you can also use a tile nipper or a razor blade. Make sure you wear safety goggles when you’re cutting and sanding. Once the tiles are cut, you’ll need to spread the adhesive on the wall. There are several types of adhesive you can use. Make sure you read the instructions on the package to make sure you’re applying the right type of adhesive. Finally, you’ll need to apply the tiles to the wall. You can use a rubber mallet to press them into place. Once all the tiles are in place, you’ll need to wait for the adhesive to dry before you can grout and seal the backsplash. Installing a tile backsplash is an easy process with the right materials and tools. With a bit of patience and a few simple steps, you can easily update your kitchen or bathroom with a beautiful tile backsplash.
How to install a beadboard backsplash?
One popular type of backsplash is a beadboard backsplash. To install a beadboard backsplash, you’ll need beadboard panels, a level, a utility knife, and adhesive. Begin by measuring the area where you’ll be installing the backsplash and cutting the beadboard panels to size. Make sure to use a level to check each panel before attaching it to the wall. Apply the adhesive to the wall and attach the beadboard panels to the wall.
Use a utility knife to trim any excess material around the edges. Finally, use a caulk gun to fill any gaps between the beadboard panels and the wall. This will create a professional looking finish. Once the adhesive has dried and the caulk has been applied, you have successfully installed your beadboard backsplash. With a few simple steps, you can easily update the look of your kitchen or bathroom.
How to install a simple subway tile kitchen backsplash?
Here’s how to do it using an adhesive backsplash. First, clean the wall surface and make sure it is free of dust, grease, and dirt. Then measure the space you plan to cover and determine the number of tiles you will need. Next, cut the tiles to size and apply the adhesive to the back of the tiles. Starting at the bottom and at the corner, press each tile firmly against the wall, making sure to press out any air bubbles.
Continue working up the wall, ensuring that the tiles are evenly spaced. If necessary, use spacers to keep the tiles even. Once all the tiles are in place, apply grout between the tiles and smooth out any excess with a wet sponge. Allow to dry and then apply a sealant to protect the grout. Now you have a beautiful Subway Tile kitchen backsplash that will give your kitchen an updated look. Enjoy!
How to install stacked stone tile backsplash?
To install this type of backsplash, you will need to use a high-quality adhesive to ensure that it sticks securely. Begin by measuring the area where you want to install the backsplash and use a pencil to mark the desired dimensions. Then, use a tile saw to cut the tiles to size. Next, apply the adhesive to the wall where you plan to install the tiles. Start at the bottom of the wall and work your way up, ensuring the adhesive is evenly spread and well-adhered.
Once the adhesive is in place, begin to install the tiles. Start at the bottom of the wall and work your way up, pressing each tile firmly into the adhesive. Leave a small gap between each tile to allow for expansion and contraction. Once all of the tiles are in place, allow the adhesive to dry for at least 24 hours before grouting. Once the grout is dry, you can seal the tiles to ensure they will last for years to come.